

Faceplates and Overlays
Graphic Overlays: Functional UI Graphics That Protect Brand Identity in Communications
On communications equipment, the front panel is where users meet your brand. Whether someone is operating a radio, checking a network device, or adjusting an intercom, the interface needs to make every action clear.
Graphic overlays bring instructions, controls, and branding together on one surface. They identify buttons, frame displays, and help users understand equipment status. Their construction also helps protect printed graphics from everyday handling and cleaning.
When designed well, communication equipment overlays support reliable operation while keeping products recognizable across models, installations, and years of service.
Material and Finish Selection
Choosing materials starts with understanding where and how the equipment will be used. A desktop communications terminal faces different conditions than an outdoor intercom or a handheld radio.
Consider frequent handling, cleaning products, sunlight, temperature changes, and contact with oils or moisture. These conditions should guide the overlay specification alongside appearance.
Match the material to the application
Polyester and polycarbonate are common choices for electronics overlays. Both offer design flexibility, but the right grade, coating, and thickness depend on the application.
Polyester is often considered for flexible button areas and applications requiring resistance to repeated use and cleaning. Polycarbonate offers options for textures, finishes, and detailed printed graphics. Performance varies by construction, so material samples should be evaluated against actual operating conditions.
Printing graphics beneath a transparent film can help shield the ink from direct abrasion. This approach supports durable overlays that retain readable instructions and consistent branding through everyday use.
Choose a finish that supports usability
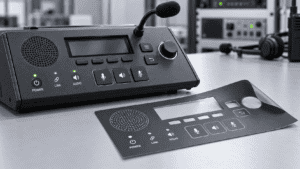
A finish affects how the panel looks and feels. Matte or textured surfaces can reduce distracting reflections and make fingerprints less noticeable. Gloss areas may support a crisp appearance around selected visual elements.
Custom panel overlays can combine finishes, giving the control area a practical texture while keeping viewing areas clear. Material suppliers also offer films and coatings designed for scratch resistance, chemical resistance, and transparent windows.
Brand consistency belongs in this discussion, too. Define approved colors, logo proportions, typography, and surface appearance before production. Branded interface graphics should look like part of the same product family, even when panel sizes change.
Readability: Deadfront Graphics, Backlighting, and Display Windows
Good product interface design helps users understand what to do without stopping to interpret the panel. Clear labels, recognizable symbols, and logical grouping make controls easier to navigate.
Start with contrast and spacing. Small lettering, crowded icons, and decorative backgrounds can make important information harder to find. Check artwork at its actual production size.
Use deadfront graphics with purpose
Deadfront graphics conceal selected symbols or messages until they are illuminated. This creates a cleaner appearance while allowing status information to appear when needed.
For communications products, this approach can highlight an active function, connection status, or alert. The design must balance concealment when unlit with visibility when illuminated. Prototype reviews should include both conditions.
Evaluate backlighting in the assembled product
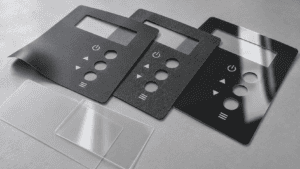
Backlit overlays need more than attractive artwork. Ink opacity, light transmission, LED placement, and surrounding components all influence the result.
Check for uneven brightness, light leaking into adjacent symbols, and icons that become difficult to distinguish. Review the panel in bright rooms and dim environments, using the intended light source.
Keep display windows clear and aligned
Display windows need to match the viewing area and the information behind them. Clear, tinted, or selectively finished windows should be evaluated with the actual display.
Confirm that text remains readable from expected viewing angles. Also check alignment, reflections, and whether adhesive or printed borders interfere with visibility. Effective HMI graphics—the visual elements of a human-machine interface—help users read equipment status quickly and accurately.
Failure Modes and a Practical Test Plan
An overlay can look excellent at approval and still develop problems in service. Testing should address how the finished construction performs on the intended enclosure.

Common failure modes include:
- Edge lifting: Adhesive releases around corners, openings, or panel edges.
- Surface wear: Scratches or repeated cleaning reduce readability.
- Color changes: Exposure alters the appearance of brand colors.
- Window problems: Haze, scratching, or misalignment affects visibility.
- Button-area damage: Repeated pressing causes cracking or visible wear.
Build a test plan around realistic use. Apply samples to the actual panel material using the proposed installation process. Check adhesion after the specified dwell time and after relevant temperature or humidity exposure.
Test cleaning resistance with the products customers will use. Evaluate abrasion, repeated button operation, and sunlight exposure where applicable. Inspect illuminated graphics and windows after testing as well.
Set measurable acceptance criteria before testing begins, including acceptable color variation, edge lift, window clarity, and legibility.
At PPS, the conversation starts with your equipment, operating conditions, and brand requirements. Bring those details into your next graphic overlays project to create an interface that stays clear, consistent, and ready for everyday use.